Are you looking for a flexible touch display for your smart home or DIY IoT project? Then the 7″ HMI ESP32 display from Elecrow is just the thing for you. In this article, I'll show you what the display can do, who it's suitable for - and how you can use it to display a home assistant dashboard.
For detailed instructions and explanations of all configuration options, I recommend watching the YouTube video linked below. This video goes into detail about each individual setting, providing you with comprehensive instructions on how to set everything up correctly. Any code from the video can be found in this article, so you can use it directly without having to type it out.
🧠 What is this device?
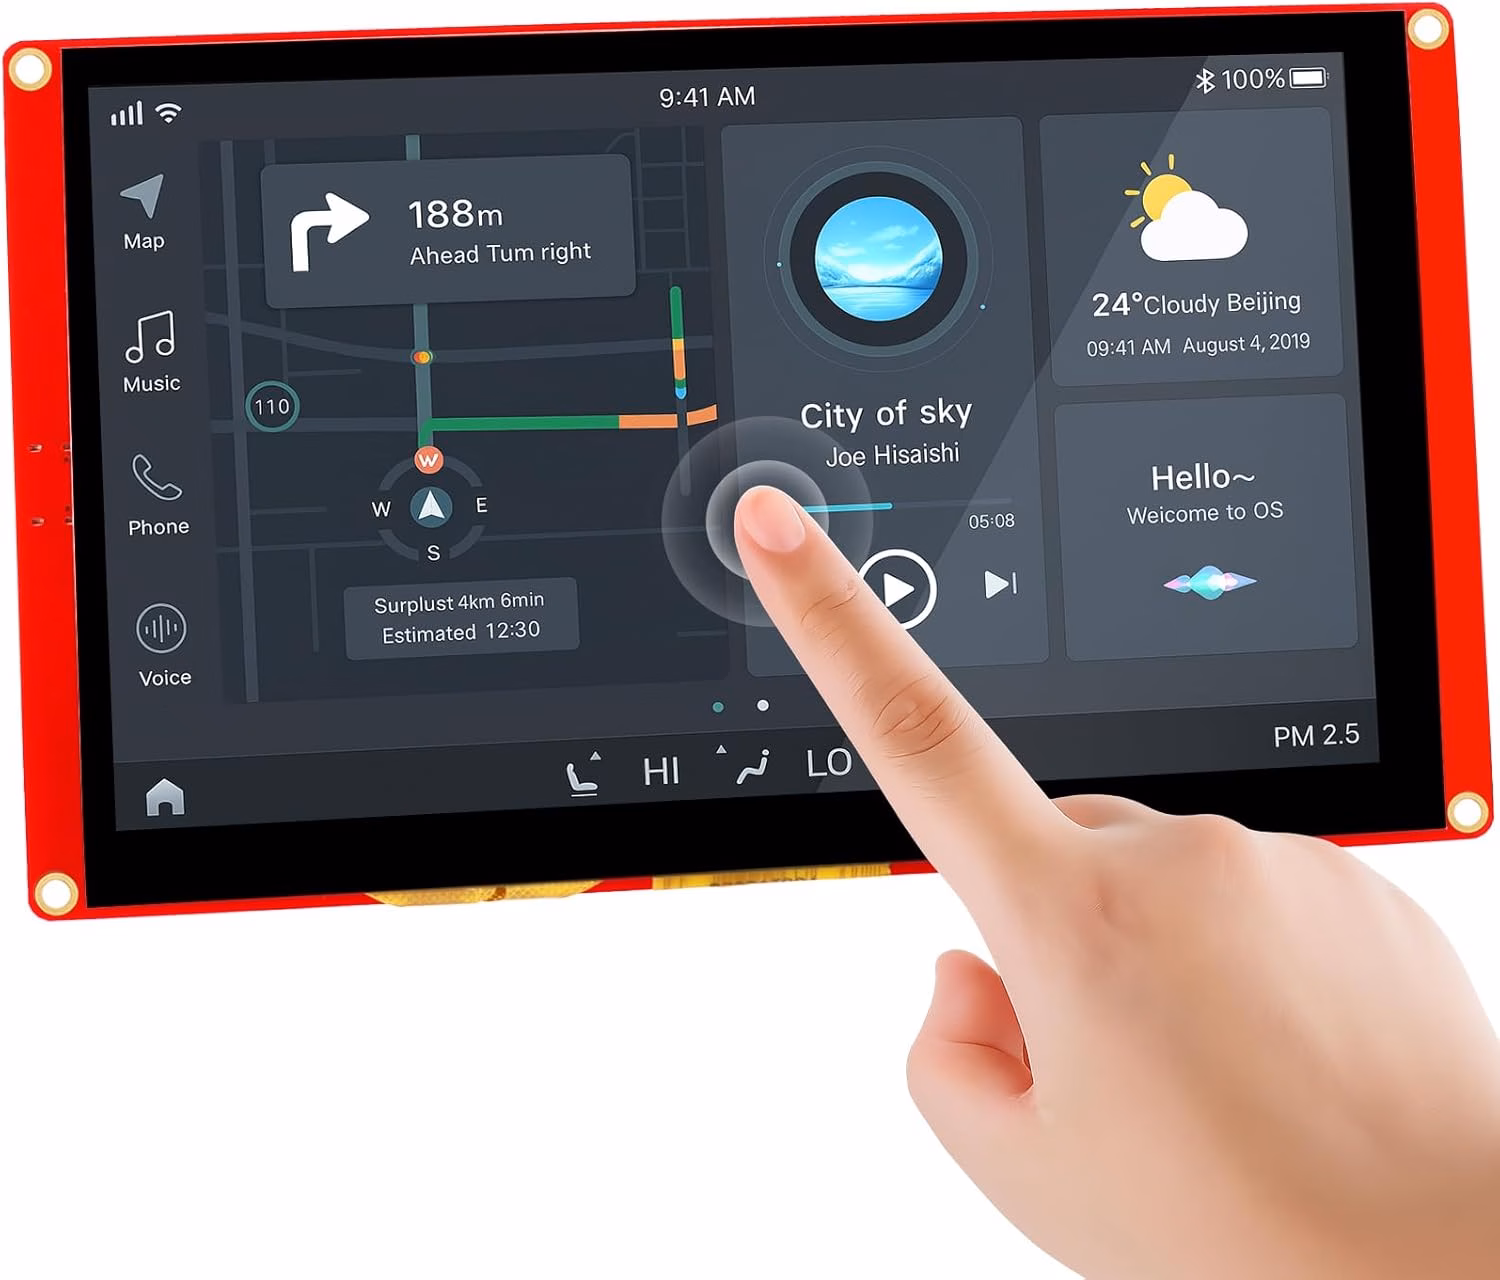
The Elecrow CrowPanel 7″ HMI ESP32 display is a compact touch controller with integrated ESP32-S3 module. It is designed for touch UIs (HMIs) and IoT applications.
It has integrated WLAN and Bluetooth, supports capacitive touch and, at 800×480 pixels, offers enough space for appealing user interfaces.
The software basis: LVGL (Light and Versatile Graphics Library) - a modern UI library for microcontrollers that allows you to create graphically appealing dashboards, buttons, sliders and much more. Ideal for your own IoT projects or as a central control unit for your home.
🔧 Key technical data (basic version):
- Screen7″ TN-TFT, capacitive touch, 800×480 pixels, controlled via EK9716BD3 + EK73002ACGB
- ProcessorESP32-S3-WROOM-1-N4R8, Dual-Core LX6 @ 240 MHz
- Memory4 MB Flash, 8 MB PSRAM
- CommunicationWi-Fi 2.4 GHz (b/g/n), Bluetooth 5.0
- Interfaces: USB-C, TF card slot, GPIO, UART, I²C, battery port, button (BOOT/Reset)
- Operating range: -20 °C to +70 °C
HMI stands for Human-Machine Interface - i.e. the interface between a People (User) and one machine (e.g. a device, a controller or an embedded system).
🧠 What is an HMI display?
A HMI display is a Screen with controls, The term used by a person to interact with a technical system. This includes:
- Display of informatione.g. sensor values, system status, error messages
- Input by the usere.g. touch, buttons, voice input
- Control systeme.g. machines on/off, set parameters, start processes
🧰 Typical application examples for HMI displays:
| Range | Example |
|---|---|
| Smart Home | Wall panel for lighting and heating control |
| Industry | Control panel of a machine or conveyor system |
| Vehicles | Infotainment touchscreen, climate control |
| Medical technology | Display & control for laboratory devices |
| IoT / DIY | Sensor data display + touch UI (e.g. temperature, humidity) |
💡 What makes a good HMI?
- Intuitive operation (e.g. touch screen, simple menus)
- Reliability (runs stable, does not hang up)
- Feedback (indicates what is happening)
- Good visualization (diagrams, icons, colors)
- Flexibility (customizable interface, various input forms)

✅ What can you do with it?
1. develop user interfaces (UIs)
- Classic HMI for smart home, industry, automotive, medicine.
- Uses LVGL or SquareLine Studio - full widget support
- Many sample tutorials & demo interfaces included.
2 IoT & wireless control
- WLAN & Bluetooth for cloud connection, MQTT, web server, app control.
- Expandable e.g. with LoRa/thread for mesh networks (e.g. Meshtastic).
3. audio interaction (advanced)
- Microphone + loudspeaker enable voice control, assistance functions, calls...
4. sensor integration & data logging
- TF slot + I²C/GPIO/UART enable sensor data, SD logging, RTC, BME280 & Co.
5. mobile UI prototypes
- Ideal for portable devices with battery connection and optional housing.
- Areas of application: portable instruments, car HMI, home automation.
📡 Integration in Home Assistant
A real game changer is the Using the display as a local home assistant dashboard. This is how it works:
- Install LVGL and a suitable web client (e.g. with WebView or LVGL-based GUI).
- Create a local web panel in Home Assistant, that points to an internal IP (e.g. via
lovelaceView or Kiosk mode). - Use Wi-Fi of the ESP32, to display the dashboard - controlled via WebView, MicroPython HTTP client or even MQTT.
- Optional: Connect sensors directly (e.g. DHT22, BME280) and integrate their values into the dashboard.
💪 Performance & practical experience
- The dual-core ESP32-S3 at 240 MHz with 8 MB PSRAM is sufficient for smooth animations and graphical UIs.
- LVGL works reliably, many developers report stable starter projects (e.g. on GitHub) see YouTube.
- i²c conflicts known - Touch uses pins 19/20. If several sensors are used, Touch-Init must be observed see ELECROW - FORUM.
- Some forum users criticize weak sample code documentation, but there is a community starter base
Conclusion
With the 7″ ESP32 touch display, you have an incredibly versatile tool at your fingertips: it is compact, powerful and extremely customizable - both for simple status displays and as a complete smart home control center. If you are interested in IoT or embedded GUI, this display is a real no-brainer.


2 Comments
Andrew · 3. April 2026 at 21:48
I wanted to watch the „youtube video linked below“ on setting up the elecrow espHome 7″ display with Home Assistant, but the video is something to do with TaDo?!?!?!?!?!?!?!
Sascha Brockel · 3. April 2026 at 22:31
Sorry, this is honestly my fault. This article never should have been released. I wanted to record a video about this but I really didn't know what to show as I had no use case. For developers it's a great deal but not to run Home Assistant on it for example.