Estimated reading time: 9 minutes
Want to expand your smart home without blowing your bank account? Then this mini Zigbee motion sensor is just the thing for you! For under €5, you get an amazingly functional device that integrates seamlessly with Home Assistant - via Zigbee2MQTT or ZHA.
For detailed instructions and an explanation of all configuration options, I recommend the YouTube video linked below. In this video, every single setting is explained in detail so that you receive comprehensive instructions for the exact setup. You can find any code from the video in this article so that you can use it directly without having to type it in.
The sensor: Tuya ZG-204ZL
This is an extremely compact Zigbee motion sensor from Tuya, which is officially supported by Zigbee2MQTT. You can find all information on compatibility at this page.
💰 The price? Just around 4-5 €, for example on AliExpress. Unbeatable value for money for a Zigbee device!
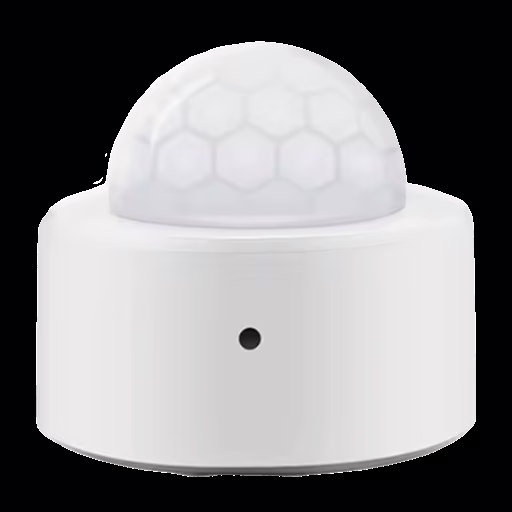
The Tuya ZG-204ZL is an ultra-compact Zigbee PIR motion sensorwhich is characterized by its minimalist design and affordable price. With a size of only 32 × 32 × 30 mm It is barely larger than a sugar cube and therefore fits easily on door frames, shelves, cupboards or under furniture. The sensor is based on the Zigbee 3.0 Standard and works reliably with Zigbee2MQTT, ZHA or another compatible Zigbee gateway such as Sonoff Zigbee Dongle Plus or the ConBee II. Power is supplied via a commercially available CR2450 button cellwhich lasts for several months depending on use.
The response time is good - detection usually takes less than a second. One disadvantage is the relatively long "cooldown" phase of approx. 60 secondsin which the sensor does not report any new movement. Although this is typical of many inexpensive Zigbee sensors, it should be taken into account when planning automations. The sensor provides a simple binary_sensor-entity in Home Assistant, which "on" with movement and "off" at standstill perfect for both simple and complex automations. An LED on the front briefly signals the status during pairing or when movement is detected.
Advantages of the sensor
- Ideal for automationLight control, notifications, security functions.
- Extremely compactFits inconspicuously in any corner.
- Good response timeDetects movements quickly and reliably.
- Light sensor: A light sensor is also included and can help.
- Battery operated (CR2450)Easy to change and lasts a long time.
What is Home Assistant?
Home Assistant is an open source platform for home automation that aims to connect and centrally control all devices in the home. It is designed to provide a unified user interface and simple, flexible control for a variety of smart home devices from different ecosystems. Here are some points in favor of Home Assistant:
- CompatibilityHome Assistant supports thousands of devices and services from various manufacturers, including lighting, air conditioning, heating, cameras, weather sensors, voice assistants and more.
- Local controlUnlike many commercial smart home platforms that rely on cloud services, Home Assistant runs locally on your network. This means increased privacy and reliability, as your smart home devices work even without an active internet connection.
- Automation and scenesOne of the main features of Home Assistant is the ability to create complex automations and scenarios. For example, you can have lights switch on automatically when it gets dark or turn on the heating when the temperature falls below a certain level.
- Simple user interfaceHome Assistant offers a user-friendly interface that makes it easy to monitor and control devices. This interface is fully customizable.
- Integration with voice assistantsHome Assistant can be integrated with voice assistants such as Amazon Alexa or Google Assistant to enable voice-controlled control of your smart home devices.
- Open source and community-drivenSince Home Assistant is open source, it is supported by an active community that is constantly developing new integrations and improving existing ones.
- Data protection and securityAs a locally running platform, Home Assistant has the advantage that the data remains within its own network. This protects privacy and increases security compared to cloud-based solutions.
In summary, Home Assistant is a powerful and flexible solution for those who want to design their own smart home and control their devices centrally, regardless of the manufacturer or ecosystem.
How to integrate the motion detector into Zigbee2MQTT and Home Assistant 🔌📡
I recommend the integration via Zigbee2MQTTas the sensor is directly supported there. Of course you can also use it with ZHA but sometimes less information is visible here.
✅ Requirements
Before you get started, make sure that you have already set up the following:
- A running Home Assistant (e.g. on a Raspberry Pi, Home Assistant OS, Docker or similar)
- Zigbee2MQTT is installed and running (e.g. as an add-on or container)
- You have a Zigbee sticke.g. the Sonoff Zigbee 3.0 USB Dongle Plus
- The MQTT broker (e.g. Mosquitto) is set up and connected to Zigbee2MQTT and Home Assistant
🔧 Step 1: Set the sensor to pairing mode
Place a CR2450-Battery into the sensor (in this case it is included).
- Press the small Button on the back for 5 secondsuntil the LED flashes.
→ The sensor is now in the Pairing mode.
📌 Tip: Make sure that the sensor is close to your Zigbee stick during pairing (max. 3-4 m).
🧩 Step 2: Add device in Zigbee2MQTT
- Open the web interface of Zigbee2MQTT (e.g. via
http://deine-ip:8080). - Click on the button at the top right "Permit join (All)" resp. "Activate teach-in (all)"to allow new devices to connect.
- The sensor should appear within a few seconds - usually with the name
TS0601or a device identifier such as0x123456789abcdef. - Click on the new device, optionally assign your own name (e.g.
Kitchen motion sensor) and save. You can also update the name in Home Assistant directly. The device will be added to Home Assistant immediately if you have already integrated Zigbee2MQTT.
Step 3: Integration in Home Assistant
As soon as Zigbee2MQTT recognizes the device and your MQTT broker is correctly connected, Home Assistant recognizes automatically all available sensor values as entities.
How to find them:
- In Home Assistant, go to "Settings → Devices & services → MQTT → Devices".
- You will now see your new device there, e.g. "
Kitchen motion sensor
With these steps, the sensor is fully integrated and provides permanent measurement data that you can use for visualizations, notifications or automation - all locally, without the cloud, and reliably via Zigbee.


Automation example
I am using a blueprint for this example. About this link you can add the Blueprint directly to your Home Assistant.
The Blueprint automates the Light control based on movementwith many optional settings and special rules - ideal for anyone who wants more than just "motion on = light on".
✅ The main functions at a glance:
- Switches light on when movement is detected
- As soon as movement is detected, one or more lights or scenes are activated.
- Switches the light off again automatically
- The light is automatically switched off after an individually adjustable time without any detected movement (e.g. 30 seconds or 5 minutes).
- Can only be activated in certain lighting conditions
- You can set the light to only be activated when it is dark (e.g. via a brightness sensor or the position of the sun).
- Presence detection possible
- The automation can pause if, for example, you have activated a certain mode such as "Watch movie".
- Brightness control for different times of day
- You can define different brightness levels or scenes for "Day", "Evening", "Night" etc. - depending on the time of day or other conditions.
- Respect manual overwriting
- If you switch the light on manually or select a scene, the automation can be paused or delayed.
- Multiple motion sensors possible
- You can optionally integrate additional motion sensors (e.g. in the hallway and kitchen).
alias: Kitchen motion detector
description: ""
use_blueprint:
  path: brigger/advanced_custom_motion_sensor.yaml
  input:
    motion_entity:
      - binary_sensor.kuche_motion_sensor_occupancy
    light_target:
      entity_id: light.kuche_ceiling_lights
    luminance_sensor: sensor.kuche_bewegungsmelder_illuminance
    no_motion_wait: 100
    luminance_required: 950
🔍 The most important functions of this configuration:
- Motion sensor:
The sensorbinary_sensor.kuche_motion_detector_occupancyused. As soon as here Movement is detectedthe automation checks the ambient brightness. - Lighting control:
The target light islight.kuche_ceiling_lights. This light is only then switched onif the conditions are met (e.g. it is dark enough). - Brightness sensor (lux value):
Automation is based onsensor.kuche_motion_detector_illuminanceto. This is the Integrated light sensor in the motion detector, which indicates the current Light value in lux supplies. - Only switch on lights in the dark:
Aboutluminance_required: 950it is specified that the light may only be switched on ifwhen it darker than 950 lux is on. This prevents the light from being switched on unnecessarily during the day. - Follow-up time:
no_motion_wait: 100means that the light Automatically switched off again 100 seconds after the last movement will be displayed - provided no new movement has been detected.
YouTube video implementation
Conclusion
This sensor is a real price-performance miracle! For less than €5, you can get a reliable Zigbee device that is a useful addition to your smart home. It's easy to set up, very useful - and you don't need to spend a fortune.
If you're just starting out with Home Assistant or want to expand your setup, this sensor is a perfect place to start. 🔧


0 Comments