Estimated reading time: 8 minutes
Mountains of paper are annoying. Whether it's invoices, contracts or insurance policies - everything piles up at some point. But don't worry: with Paperless-NGX you can not only digitize your documents, but also Manage smartly and find them again in a flash. And the best thing? You have full control over your data - local, secure and open source.
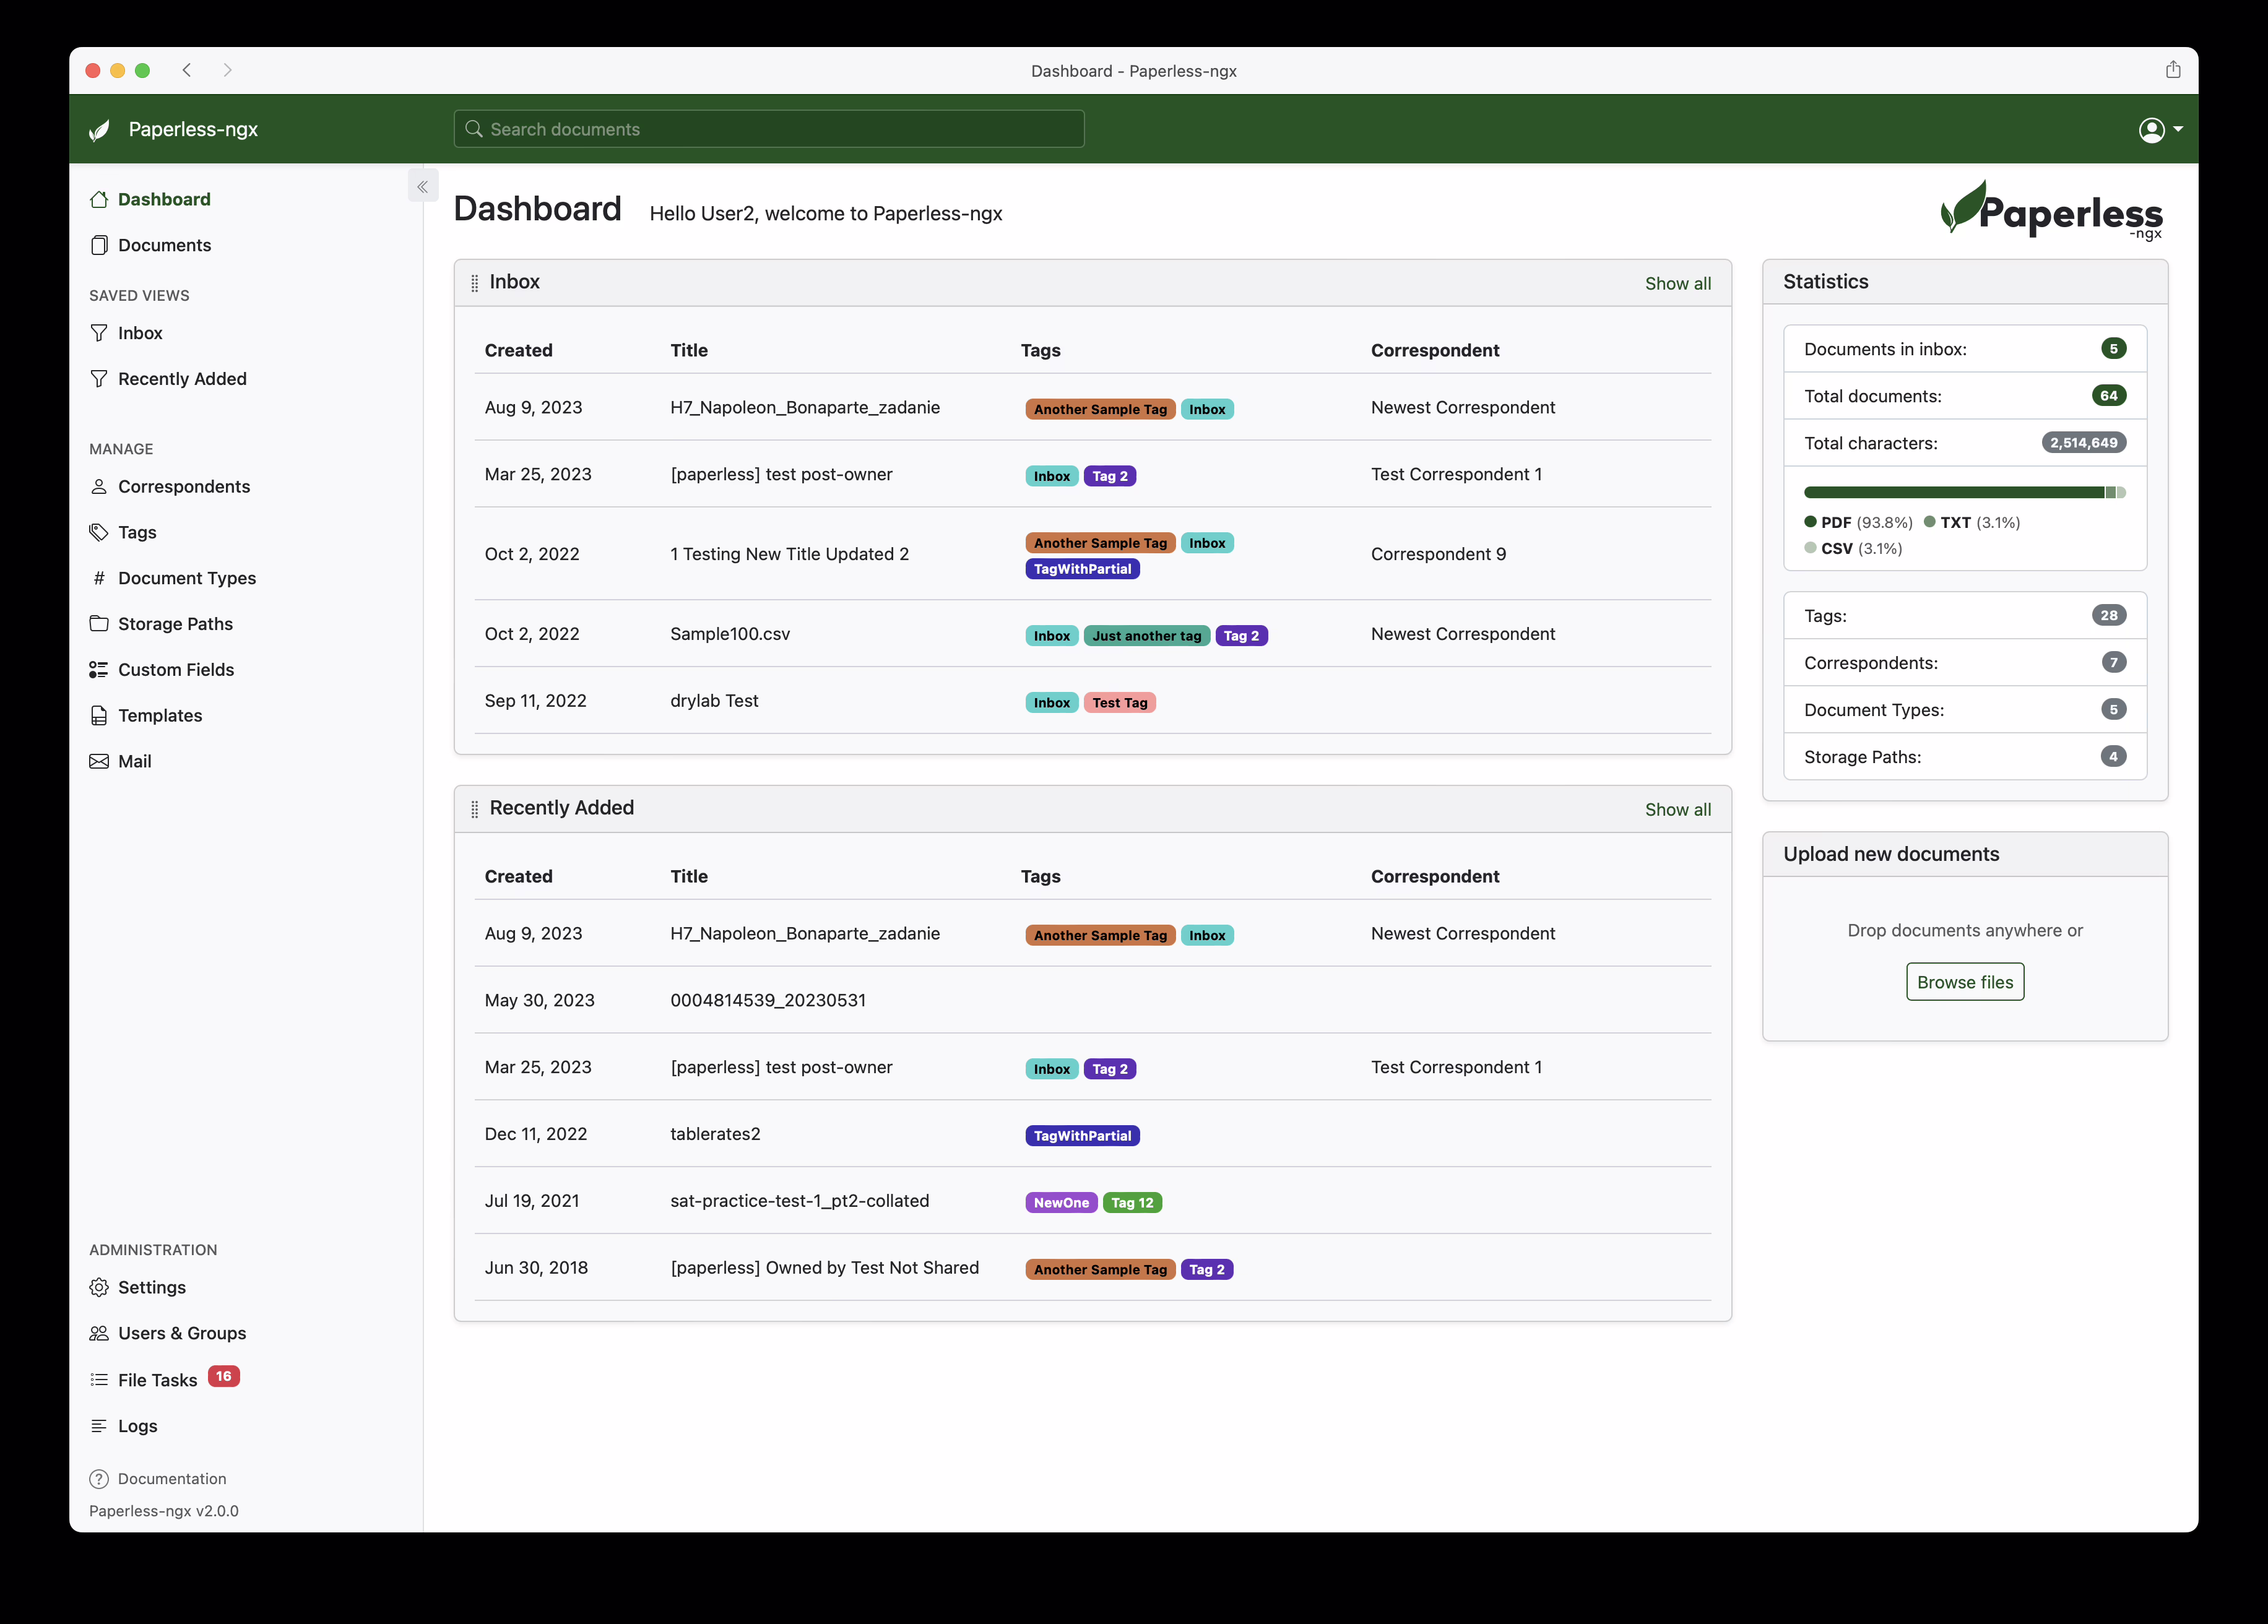
In this article, I'll show you how to set up, configure and make the most of Paperless-NGX - without any cloud constraints. Let's go paperless! I use it myself and have almost 2000 documents stored there that I can always access from anywhere. What a dream! In the AI hype, even tools like Paperless AI to automatically tag documents, for example.
Still not convinced? There is also a public demowhich you have access to and can simply give it a try!
For detailed instructions and an explanation of all configuration options, I recommend the YouTube video linked below. In this video, every single setting is explained in detail so that you receive comprehensive instructions for the exact setup. You can find any code from the video in this article so that you can use it directly without having to type it in.
This blog post and video is part of a series in which we create and set up our own home server. We start with the basics such as an Ubuntu VM installation with Docker and then continue with the configuration of our own domain, security precautions and, above all, lots of cool and useful self-hosted services. Whether media servers like Plex or Jellyfin or document management like Paperless-NGX. Together we'll build the setup you want to see. We even tackle topics such as single sign-on (SSO) together.
What is Paperless-NGX anyway?
Paperless-NGX is an open source document management solution that helps you to centrally organize scanned and digital documents. It recognizes content thanks to OCR (text recognition), automatically indexes it and makes it searchable.
👉 Ideal for:
- Private households
- Freelancers & self-employed persons
- Small companies
- Tech-savvy DIY archivists
Functions at a glance
Here you get a strong overall package:
- OCR text recognitionSupports multiple languages, including German - recognizes text in PDFs and images.
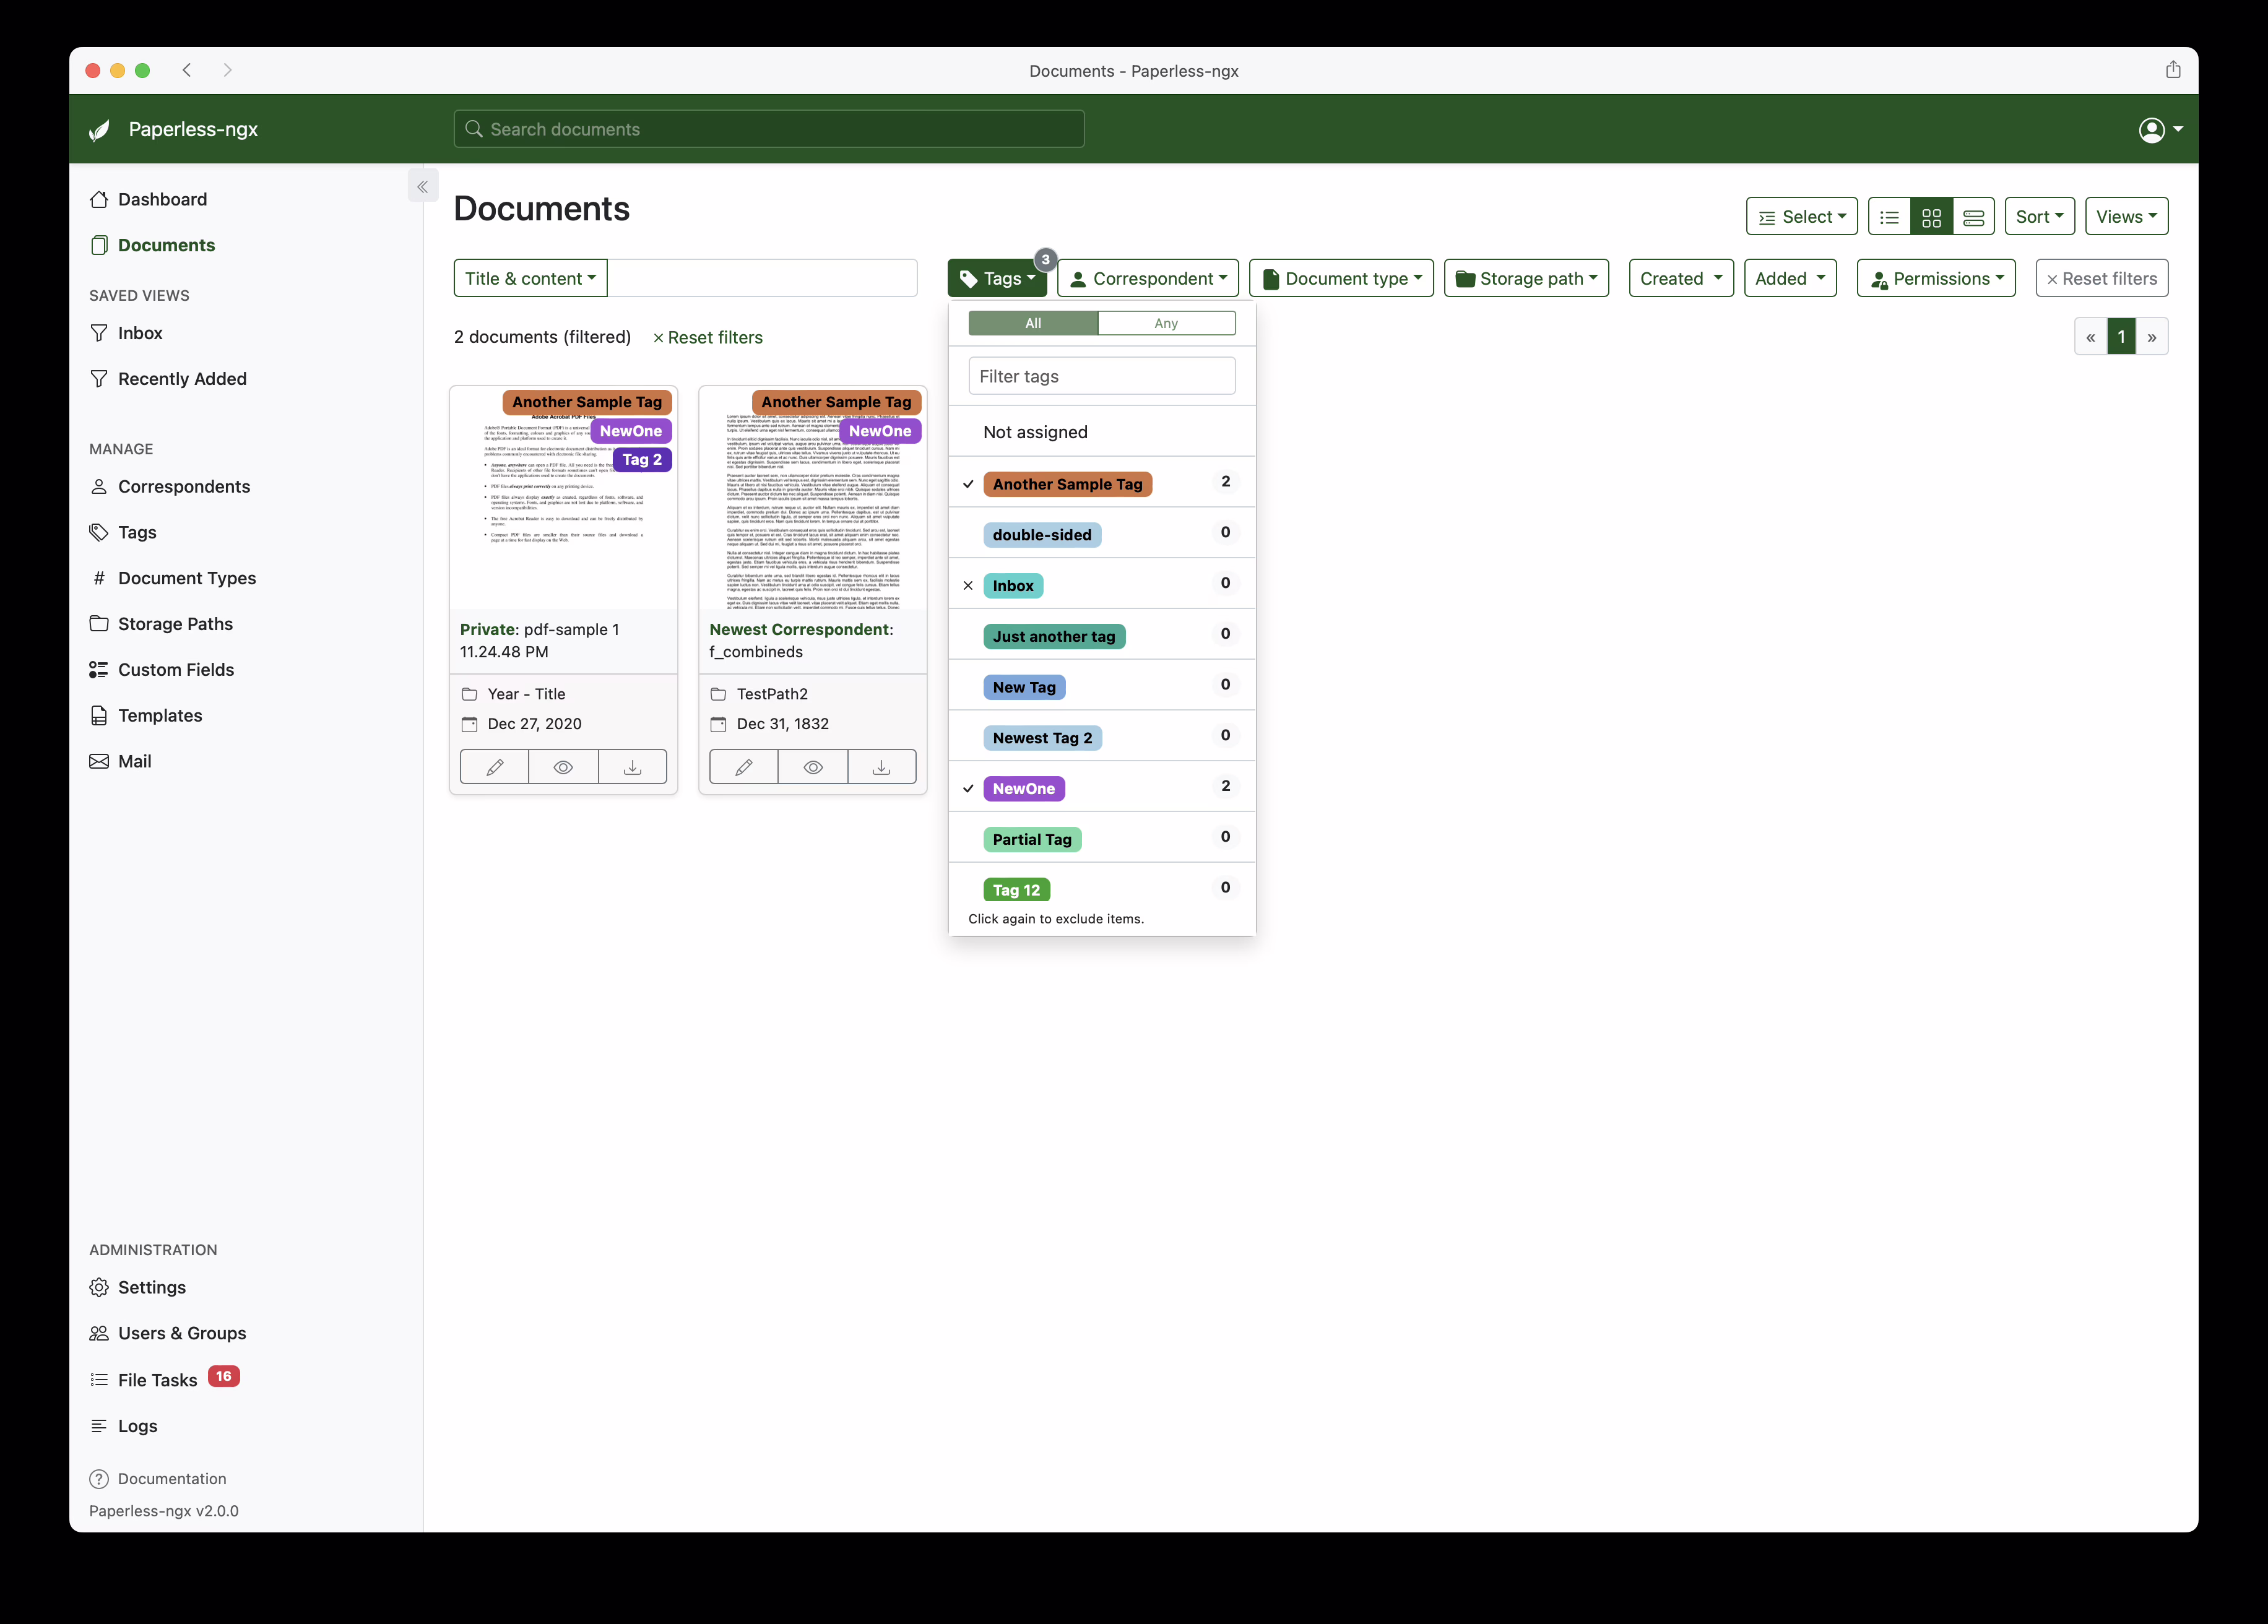
- Keywording (tags)Automatic or manual - so you can find everything in no time at all.
- Document types & correspondentsClassify e.g. as "Invoice", "Contract", "Bank" etc.
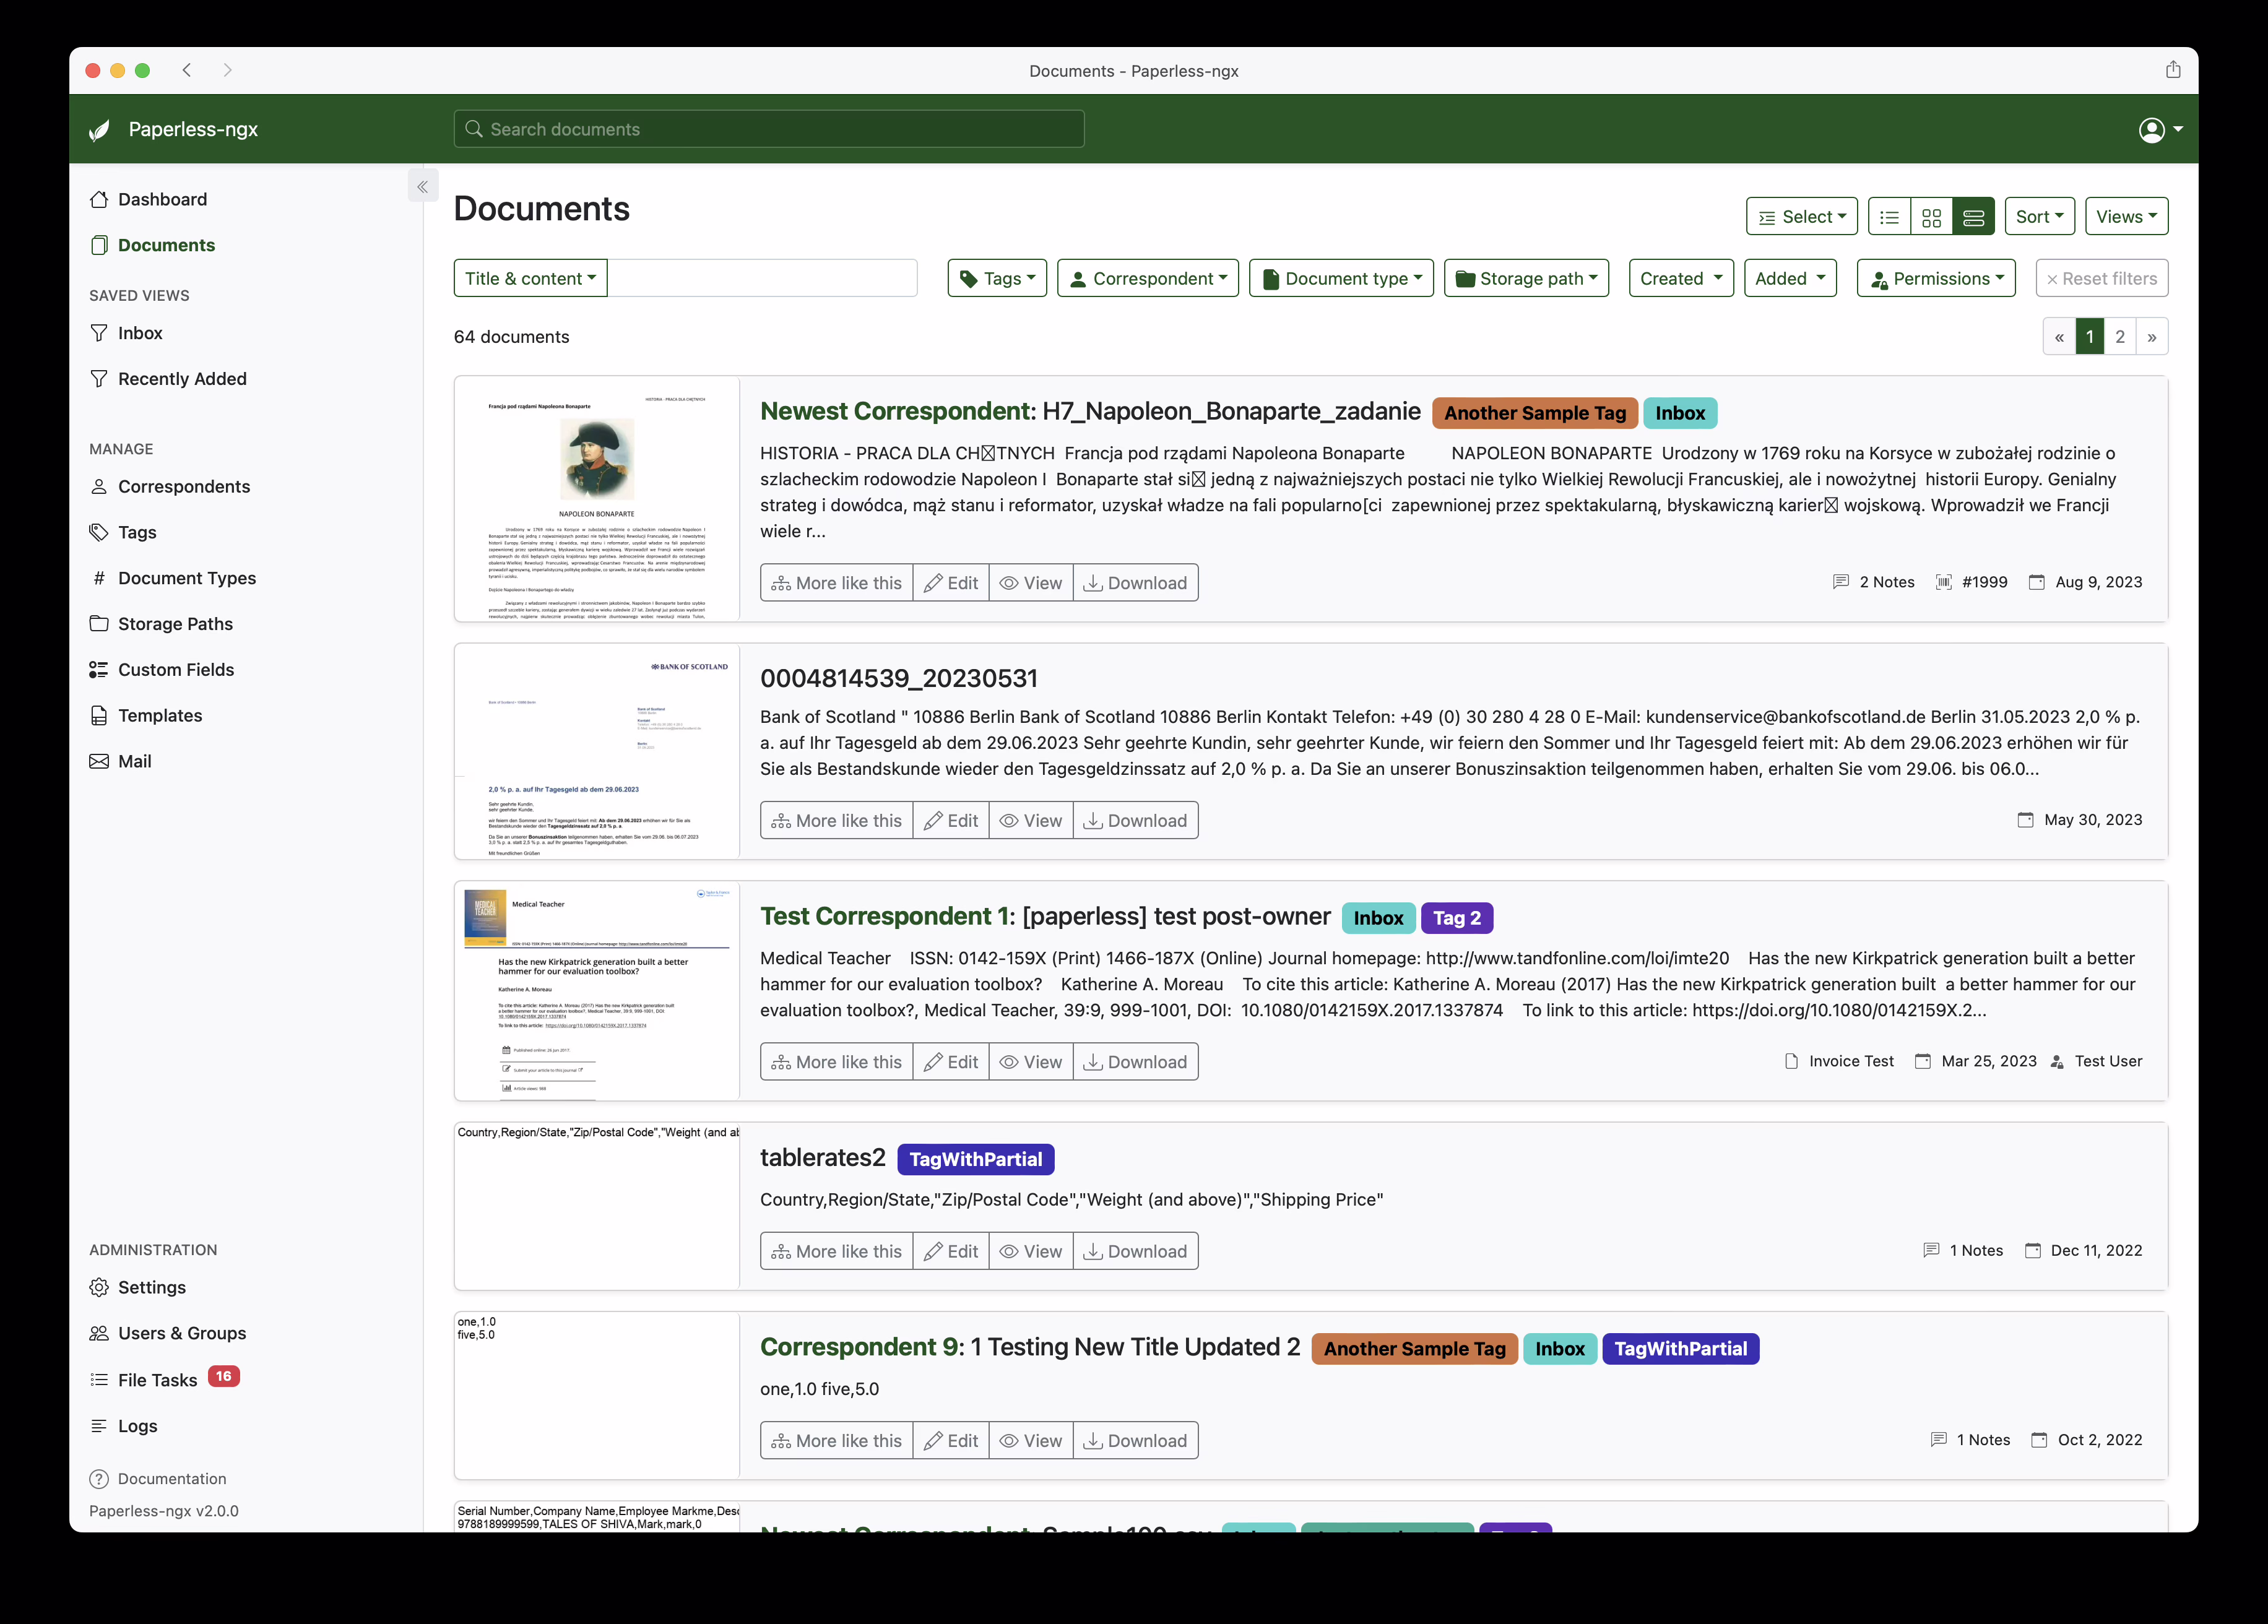
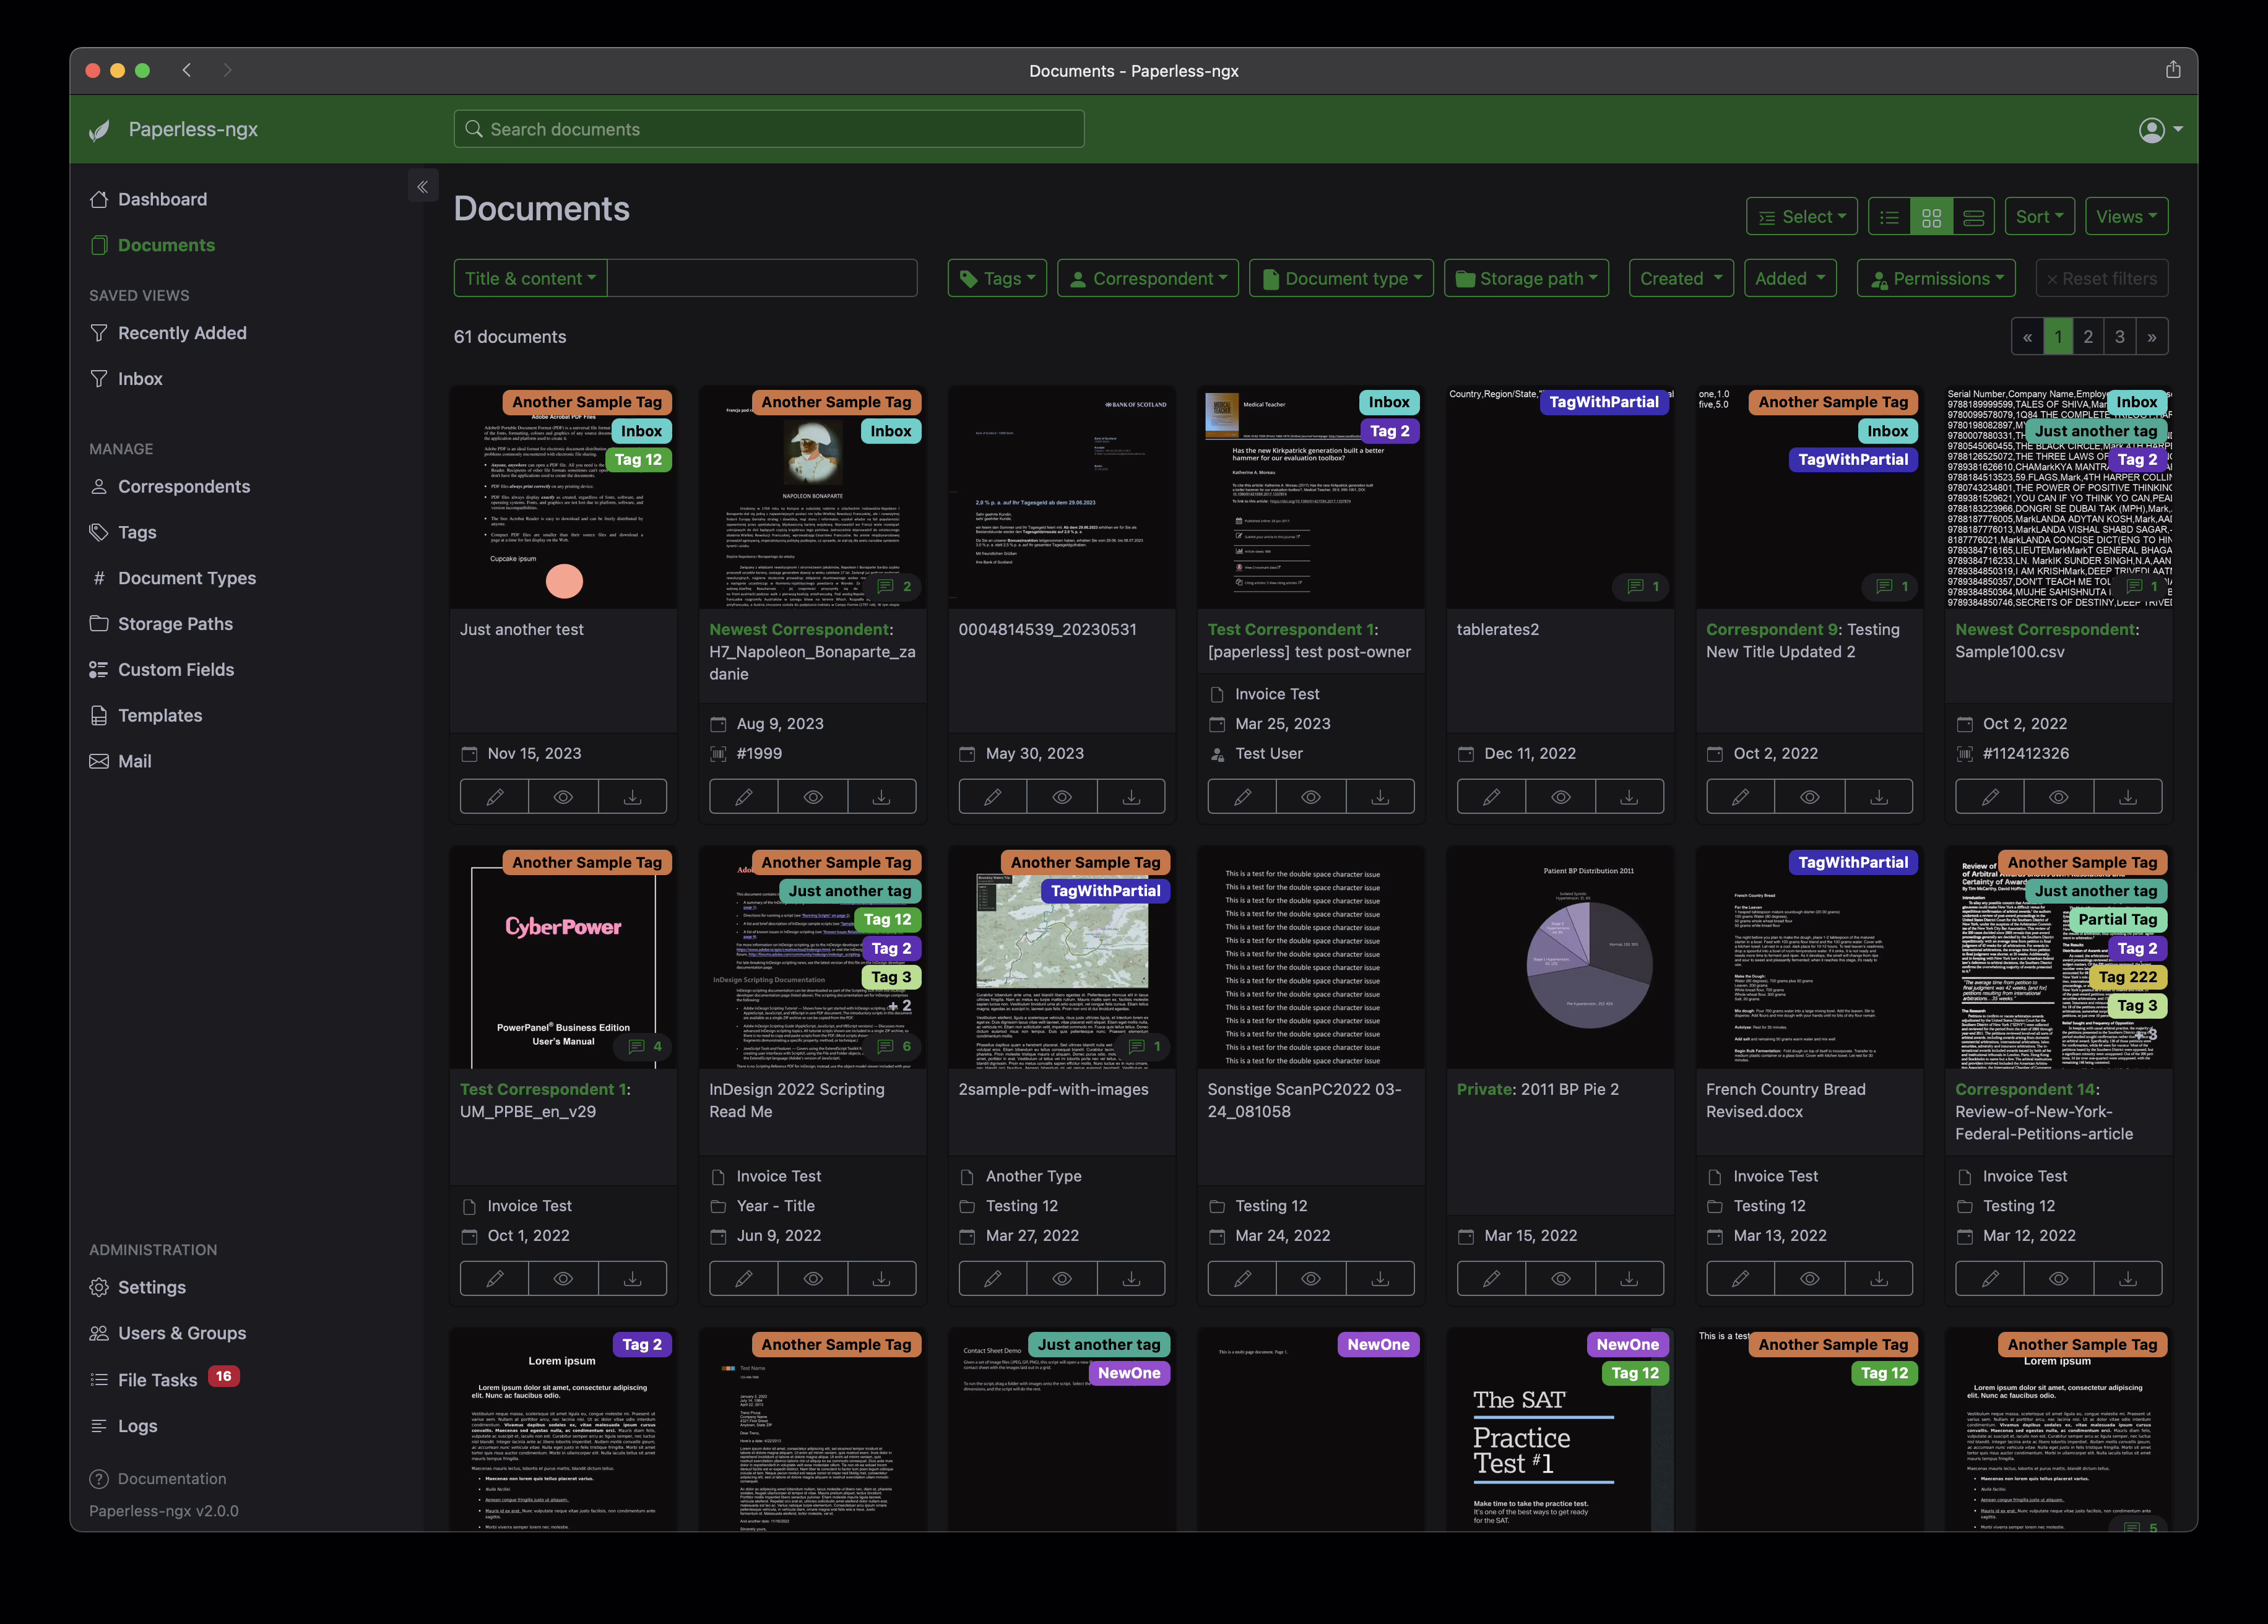
- Filter & SearchUse keywords, date, document type or full text search.
- E-mail importGet attachments directly from a mailbox.
- Drag & Drop UploadSimply pull in and you're done.
- Multi-user capableShare the system with your family or your team.
- REST API & webhooks: For nerds and automation experts 💻


Digitize documents: Scanner, app or e-mail
1. paper scan
Use a scanner or a multifunctional device. You can also use apps like Adobe Scan, Microsoft Lens or Scanbot use.
2. import by e-mail
Set up an email account in Paperless (IMAP) - e.g. [email protected] - and all attachments are automatically saved in the system. You can also have the entire mail saved.
More on this in the Mail import documentation.
3. drag & drop or hotfolder
Drag files in via the web interface or set up automated upload folders - e.g. via Nextcloud Sync.
Classify & retrieve documents
Paperless-NGX recognizes content automatically - and you can help manually:
- Tagse.g. "tax", "car", "insurance"
- Document typee.g. "invoice", "contract"
- Correspondente.g. "Stadtwerke", "Allianz"
- DateEither manually or via detection
Thanks to this metadata, you can later use the intelligent search function any document in seconds. The search works like Google - even across full-text content.
Configuration & automation: Make yourself comfortable
Paperless-NGX offers you many options to automate your archive:
✏️ Document rules
Automatic assignment of tags, correspondents or types based on keywords or file names.
👉 Example: If the text contains "Alliance", the correspondent "Alliance" is automatically assigned.
More under: Advanced topics
⚙️ Set OCR language
If you have a lot of documents in German, set the configuration to PAPERLESS_OCR_LANGUAGE=enu in.
🗂️ Customize file and directory structure
Define folders such as consume, export, media, data - depending on how you want to enter or save data.
🔐 User rights
Create users and define access rights - perfect for several household members or employees.
Installation of Paperless-NGX in Docker
✅ Requirements
Before you start, make sure that:
- Docker and Docker Compose are installed.
- Sufficient storage space is available.
- ports (8000 by default) are not otherwise blocked.
- You use a Linux system or support Unraid in Docker.
🧱 Overview of required services
Paperless-NGX requires the following services:
| Service | Purpose |
|---|---|
| PostgreSQL / MariaDB | The relational database for documents and users. |
| Redis | Fast cache for temporary storage and queue processing. |
| Tika (optional) | Text analysis of Office documents, e-mails, etc. |
| Gotenberg (optional) | Conversion of Office documents to PDF |
🧾 docker-compose.yml
services:
  redis:
    image: redis:7
    restart: unless-stopped

  paperless-ngx-db:
    image: postgres:17
    container_name: paperless-ngx-db
    restart: unless-stopped
    environment:
      POSTGRES_DB: paperless
      POSTGRES_USER: paperless
      POSTGRES_PASSWORD: yourstrongpassword
    volumes:
      - /mnt/cache/appdata/paperless-db:/var/lib/postgresql/data
    healthcheck:
        test: pg_isready -U paperless -d paperless
        interval: 1m
        timeout: 10s
        retries: "3"

  gotenberg:
    image: gotenberg/gotenberg
    container_name: gotenberg
    restart: unless-stopped
    ports:
      - "3000:3000"
    healthcheck:
        test: curl --fail http://localhost:3000/health || exit 1
        interval: 1m
        timeout: 10s
        retries: "3"
    command: gotenberg --chromium-disable-javascript=true
        --chromium-allow-list=file:///tmp/.*

  tika:
    image: ghcr.io/paperless-ngx/tika:latest
    container_name: tika
    restart: unless-stop
    ports:
      - 9998:9998
    healthcheck:
	test: timeout 10s bash -c ':> /dev/tcp/127.0.0.1/9998' || exit 1
	interval: 1m
	timeout: 10s
	retries: "3"

  paperless-ngx:
    image: ghcr.io/paperless-ngx/paperless-ngx
    container_name: paperless-ngx
    depends_on:
      - paperless-ngx-db
      - redis
    ports:
      - "8000:8000"
    environment:
      PAPERLESS_REDIS: redis://redis:6379
      PAPERLESS_DBHOST: db
      PAPERLESS_DBNAME: paperless
      PAPERLESS_DBUSER: paperless
      PAPERLESS_DBPASS: yourstrongpassword
      PAPERLESS_TIME_ZONE: Europe/Berlin
      PAPERLESS_OCR_LANGUAGE: deu+eng
      PAPERLESS_FILENAME_FORMAT: "{created_year}/{correspondent}/{created}-{document_type}-{title}"
      PAPERLESS_TIKA_ENABLED: "true"
      PAPERLESS_TIKA_ENDPOINT: http://tika:9998
      PAPERLESS_TIKA_GOTENBERG_ENDPOINT: http://gotenberg:3000
      PAPERLESS_SECRET_KEY: supersecretkey123
      PAPERLESS_ADMIN_USER=yourName
    volumes:
      - /mnt/cache/appdata/data:/usr/src/paperless/data
      - /mnt/cache/appdata/media:/usr/src/paperless/media
      - /mnt/anywhere/consume:/usr/src/paperless/consume
      - /mnt/cache/appdata/export:/usr/src/paperless/export
    healthcheck:
        test: curl --fail http://localhost:8000 || exit 1
        interval: 1m
        timeout: 10s
        retries: "3"
You can now also make OCR settings in the UI of Paperless-NGX itself.
These folders correspond to:
consume: Here you can temporarily save / upload the new files to be imported.media: Here Paperless-ngx stores images, preview images, OCR data etc.exportBackup folder for exported files.dataContains configuration and application data.
🧼 Optional: Automatic duplicate detection & recursion
At docker-compose.yml you can add further environment variables:
      PAPERLESS_CONSUMER_DELETE_DUPLICATES: "true"
      PAPERLESS_CONSUMER_RECURSIVE: "true"
This activates the automatic detection of duplicates and allows Paperless to also recognize subfolders in the consume-directory.
🚀 Start container
Start the environment with :
docker-compose up -dMore metadata, more control: custom fields, barcodes & file formats
Would you like to store even more order and individual information about your documents? No problem! With Custom Fields (user-defined fields), you can add your own metadata - perfect if you want to go beyond the standard.
💡 Examples of custom fields:
- Invoice amount: Record the price, e.g. for household accounts or tax purposes
- Customer number or Insurance number
- Due date
- Delivery status or Project affiliation
You create the fields directly in the web interface and then assign them to individual documents - flexibly and completely individually.
🧾 Clever archiving with barcodes
Another powerful feature: Barcode recognition. Paperless-NGX can automatically recognize 1D and 2D barcodes and use the information they contain for categorization. For example, you can place a QR code on a document that contains certain tags or the correspondent. When uploading, Paperless-NGX reads the code and automatically categorizes the document.
💡 Super practical for automated workflows - e.g. for scanned letters with barcode stamps or self-generated QR codes on your invoices.
👉 You can find out more about configuration in the official documentation on barcodes.
📄 Office files and emails? No problem with Tika & Gotenberg
By default, Paperless-NGX works great with PDFs. But you can make the system even more powerful: With tools like Apache Tika and Gotenberg you also save .docx, .odt, .xlsx or .eml files directly in the system.
- Tika analyzes text content from Office documents and emails - perfect for full-text searches.
- Gotenberg converts various Office files directly to PDFs for standardized archiving.
👉 This is how you need to manage your Word documents or email attachments no longer convert manually - Paperless does this automatically in the background.
➡️ You can find the setup instructions here: Tika & Gotenberg configuration
Extensions & tips for professionals
If you like to automate or want to get the most out of it:
- Use the REST API for your own apps or scripts
- Binding Paperless-NGX in Home Assistant a
- Export your data regularly as a backup
- Use cronjobs or automation platforms such as n8n or Huginn
YouTube video implementation
Conclusion: paper was yesterday
Paperless-NGX brings real structure to your documents. You'll never have to search forever for that one invoice from 2019 again. Instead, you can find everything in seconds - securely, locally and without any subscription costs.
Whether for the private household, home office or small business: This tool is a real game changer.
🔗 Useful links at a glance
- 🔧 Official GitHub repo
- 📚 Documentation
- 💬 Paperless-NGX Community on Reddit
- 🛠️ Docker Installation Guide


1 Comment
Wolfgang · 3. November 2025 at 17:57
I have tried different variants to get Paperless-NGX running under Docker on a Linux system. Unfortunately without success.
Now I've tried to start the Docker containers with sudo (I don't actually use it). And lo and behold, now it works. I haven't yet found out what the problem is here. The Linux system is a CachyOS.