When the temperatures rise and the hot air builds up in your home, there is only one thing to do: cool down quickly and effectively. This is exactly where the DREO TurboPoly Fan 502S into play - a Powerful, smart fanthat not only looks cool, but also ventilates you and your rooms at record speed. I've tested it extensively and in this article I'll tell you why it's one of my must-haves for the summer.
For detailed instructions and an explanation of all configuration options, I recommend the YouTube video linked below. In this video, every single setting is explained in detail so that you receive comprehensive instructions for the exact setup. You can find any code from the video in this article so that you can use it directly without having to type it in.
Fresh air throughout the room in just 1 minute
Just imagine: You come home, the air is still, and within only one minute the DREO TurboPoly Fan 502S provides for Complete air circulation in the room. Thanks to its TurboAir technology designs it distributes the air evenly and efficiently - whether in the living room, bedroom or home office. The omnidirectional oscillationn of up to 120°. This means that the fan can be tilted both horizontally and vertically by up to 120°.
💨 Airflow that blows you awayWith 85 feet range (over 25 meters!), it allows even the furthest corner to breathe. Perfect if you don't want direct draughts in the bedroom, for example, but still want to feel the fresh air.
8 speeds for every situation
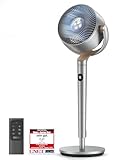
Whether it's a gentle breeze as you fall asleep or powerful ventilation after sport: with 8 individually adjustable wind levels you are guaranteed to find the right intensity for your needs. Control is super easy - either directly on the intuitive digital control panel, per Remote controlor from the comfort of your sofa via DREO App. Or even unofficially via Home Assistant integration.


Whisper-quiet at just 23 dB - ideal for night-time use
I was particularly impressed by how Quiet the fan is in operation. In the Sleep mode it generates just 23 decibels - This corresponds to the rustling of leaves. So you can sleep, read or relax without being disturbed by the fan.
🌙 TipActivate the night mode in the app and enjoy cool air with a minimal noise level. Also ideal for the children's room!
Full control - also via voice assistant
The TurboPoly Fan 502S is a real Smart Home device: You can use it with Alexa, Siri or Google Assistant and switch it on or off or change the wind level by voice command, for example. And via the free DREO App (for iOS and Android) you have access to all settings at any time - whether at home or on the move.
🗣️ Just say: "Alexa, set the fan to level 5" - and it obeys. It couldn't be smarter!
Modern design meets function
The fan not only impresses technically, but also visually. The Compact, modern design blends discreetly into any living style. The Digital LED screen is clearly legible, even in low light. And thanks to the practical Carrying handle you can easily take it from one room to the next.
Own experience
I was honestly surprised at how pleasant this fan is to use. Until Level 3 he is almost inaudible - ideal for the bedroom or at work. Nevertheless, there is still plenty of air at a short distance. Perfect for falling asleep in the heat without being kept awake by disturbing noises.
However, if you need real power, e.g. to mix or cool the air in the room in the shortest possible time, you can use the Activate turbo mode and simply tilt the appliance upwards. Within minutes, you can feel fresh air throughout the room.
I was particularly impressed by the Intelligent app control. Instead of activating the oscillation manually, you can use the 3D angle of the airflow directly in the app with an intuitive interface that allows you to adjust the fan with pinpoint accuracy.
And if you want to be really precise: in the app (and also via Home Assistant), the Swivel range accurate to the degree set - even asymmetrical! I have never seen such features in fans before.
The DREO app is Modern, clear and extremely user-friendly designed. All important functions - speed control, timer, oscillation, tilt, automatic modes - are quickly accessible and can be controlled precisely.
Discount on purchase
You can buy the DREO Turbopoly™ Fan 502S here: https://bit.ly/3ZPjAUC
With the code [Sascha] you get 17% exclusive discount on the DREO DE website.
Or also on Amazon: https://bit.ly/3HXkPuN
What is Home Assistant?
Home Assistant is an open source platform for home automation that aims to connect and centrally control all devices in the home. It is designed to provide a unified user interface and simple, flexible control for a variety of smart home devices from different ecosystems. Here are some points in favor of Home Assistant:
- CompatibilityHome Assistant supports thousands of devices and services from various manufacturers, including lighting, air conditioning, heating, cameras, weather sensors, voice assistants and more.
- Local controlUnlike many commercial smart home platforms that rely on cloud services, Home Assistant runs locally on your network. This means increased privacy and reliability, as your smart home devices work even without an active internet connection.
- Automation and scenesOne of the main features of Home Assistant is the ability to create complex automations and scenarios. For example, you can have lights switch on automatically when it gets dark or turn on the heating when the temperature falls below a certain level.
- Simple user interfaceHome Assistant offers a user-friendly interface that makes it easy to monitor and control devices. This interface is fully customizable.
- Integration with voice assistantsHome Assistant can be integrated with voice assistants such as Amazon Alexa or Google Assistant to enable voice-controlled control of your smart home devices.
- Open source and community-drivenSince Home Assistant is open source, it is supported by an active community that is constantly developing new integrations and improving existing ones.
- Data protection and securityAs a locally running platform, Home Assistant has the advantage that the data remains within its own network. This protects privacy and increases security compared to cloud-based solutions.
In summary, Home Assistant is a powerful and flexible solution for those who want to design their own smart home and control their devices centrally, regardless of the manufacturer or ecosystem.
Installation of HACS and integration of Dreo Smart Device in Home Assistant
Step 1: Installing HACS in Home Assistant
Home Assistant Community Store (HACS) is a custom add-on for Home Assistant that provides access to a variety of custom integrations and plugins developed by the community. How to install HACS:
- Check requirements: Make sure that your Home Assistant is ideally up to date.
- Download Execute script: Open a terminal for the Docker container version or the core version.
- Docker: Dial into the container with:
docker exec -it homeassistant bashor (similar) - Core: Switch to the user who is running Home Assistant
- Execute the following command for both variants:
wget -O - https://get.hacs.xyz | bash -
- Docker: Dial into the container with:
- Restarting the Home Assistant: After the files have been copied, restart Home Assistant.
- Integrate HACS into Home AssistantGo to "Configuration" > "Integrations" > "Add" in the Home Assistant interface and search for HACS. Add it and enter your GitHub token if prompted.
For the supervised version, please refer to the Documentation of HACS itself to read about the installation.
Step 2: Add Dreo Smart Device integration via HACS
Once HACS is installed, you can simply add Dreo Smart Device:
- Open HACS: Go to HACS in the Home Assistant interface.
- Search for integrationClick on "Integrations" and use the search function to search for "Dreo Smart Device".
- Install Dreo Smart DeviceFind Dreo Smart Device in the list and click on "Install". This will add the integration to your Home Assistant.
- Restarting the Home Assistant: Start Home Assistant again to apply the changes.
- Configure Dreo Smart DeviceAfter restarting, you can set up and customize Dreo Smart Device via "Configuration" > "Integrations" in Home Assistant.
Conclusion
With these steps, you have successfully installed HACS in your Home Assistant and added the Dreo smart device integration. This powerful combination opens up a world of additional features and customizations that have been and are being developed by the Home Assistant community. More blog posts and videos on useful integrations to follow. If you don't want to miss out, subscribe to my YouTube channel!
Unboxing, test & implementation in the YouTube video
Conclusion
If you are looking for a quiet, If you are looking for a quiet cool comfort, smart operation and whisper-quiet performance then the DREO TurboPoly Fan 502S a clear recommendation.
It looks modern, feels high-quality and does exactly what it is supposed to do - namely Cool effectively, quickly and quietly. And the best thing? You always retain full control - whether via Home Assistant, app, voice or remote control.
Put an end to stuffy air - Get the DREO TurboPoly Fan 502S and enjoy the lightness of an air-conditioned summer.
Do you have any questions about the device or would you like to share your experiences? Feel free to write them in the comments - I look forward to the exchange! 😊
Tip for the YouTube video: You can find the TurboPoly Fan 502S in a live test in my latest video - including my personal favorite features. Take a look and be inspired!


0 Comments