Estimated reading time: 8 minutes
Imagine the following scenario: You're lying in bed at night, tossing and turning, and suddenly the fixed lighting comes on because the motion detector in the corner has mistakenly registered activity. Or even worse: you are reading a book completely motionless, the motion detector thinks the room is empty and switches off the light. Does this sound familiar?
If you really want to make your smart home intelligent, you need a better solution for the bedroom. Here comes the Tuya TS0601 Zigbee bed sensor into the game. In this article, I'll show you how to integrate this ingenious device into Home Assistant via Zigbee2MQTT and create automations that will revolutionize your everyday life (and your nights).
For detailed instructions and explanations of all configuration options, I recommend watching the YouTube video linked below. This video goes into detail about each individual setting, providing you with comprehensive instructions on how to set everything up correctly. Any code from the video can be found in this article, so you can use it directly without having to type it out.
What is Home Assistant?
Home Assistant is an open-source platform for home automation that aims to connect all devices in the home and control them centrally. It was developed to provide a unified user interface and simple, flexible control for a wide range of smart home devices from different ecosystems. Here are some points in favor of Home Assistant:
- CompatibilityHome Assistant supports thousands of devices and services from various manufacturers, including lighting, air conditioning, heating, cameras, weather sensors, voice assistants and more.
- Local controlUnlike many commercial smart home platforms that rely on cloud services, Home Assistant runs locally on your network. This means increased privacy and reliability, as your smart home devices work even without an active internet connection.
- Automation and scenesOne of the main features of Home Assistant is the ability to create complex automations and scenarios. For example, you can have lights turn on automatically when it gets dark, or turn on the heating when the temperature drops below a certain level.
- Simple user interfaceHome Assistant offers a user-friendly interface that makes it easy to monitor and control devices. This interface is fully customizable.
- Integration with voice assistantsHome Assistant can be integrated with voice assistants such as Amazon Alexa or Google Assistant to enable voice-controlled control of your smart home devices.
- Open source and community-drivenSince Home Assistant is open source, it is supported by an active community that is constantly developing new integrations and improving existing ones.
- Data protection and securityAs a locally running platform, Home Assistant has the advantage that the data remains within its own network. This protects privacy and increases security compared to cloud-based solutions.
In summary, Home Assistant is a powerful and flexible solution for those who want to design their own smart home and control their devices centrally, regardless of the manufacturer or ecosystem.
What is the Tuya TS0601 bed sensor?
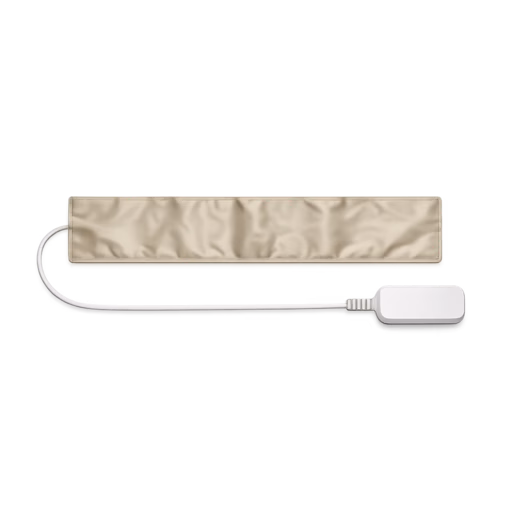
The Tuya TS0601 is neither a classic infrared motion detector nor an mmWave presence sensor that hangs on the wall. It is a pneumatic pressure sensor (often in the form of a long tube or pad), which is placed directly under your mattress.
This is how it works: The system measures minute differences in pressure. As soon as you lie down in bed, the sensor registers your weight and reports it to Home Assistant: „Bed is occupied“. When you get up, the status reliably changes back to „Bed is empty“.
The device works via the Zigbee standard. This means: no overloaded Wi-Fi networks, no cloud constraints (if you use it via Zigbee2MQTT) and a lightning-fast response time.
Setup: Integrating the bed sensor into Zigbee2MQTT
Integration into Home Assistant is child's play if you already have a Zigbee network running. We use the following for this example Zigbee2MQTT (Z2M), as it offers the greatest device compatibility.
Step-by-step instructions:
- Place hardware: Place the sensor tube or pad flat under your mattress, ideally at shoulder or chest height where most of your body weight rests.
- Activate pairing mode: Press and hold the reset button on the Zigbee unit for approx. 5 seconds until the LED flashes quickly. The sensor is now in pairing mode.
- Search in Zigbee2MQTT: Open the Zigbee2MQTT interface in Home Assistant and click on „Activate teach-in“ (Permit join).
- Name the device: After a few seconds, the sensor should appear as
Tuya TS0601_bed_presence_sensorshow up. Give it a descriptive name, for examplebed_sensor_leftorbed_sensor_master_bedroom.
What data points (entities) does the sensor provide?
Various entities are now available to you in Home Assistant. The most important is the presence-status.
- Occupancy (binary): The most important sensor for your automations. It simply indicates whether the device has registered an occupancy (
true= Bed is occupied,false= bed is empty). - Battery (Numeric): The remaining battery level in percent (0 to 100 %). Important note: It can take up to 24 hours for this value to be reported in the system after the first pairing.
- Illuminance / Raw Pressure (Numeric): Don't let the name in Home Assistant confuse you! Tuya curiously uses the default entity for „brightness“ via Zigbee (output in
lux) in order to raw pressure value (raw pressure value) of the pad. The readable value range here is between 0 and 10,000. - Sensitivity (Enum): Here you can adjust the sensitivity of the sensor directly via Home Assistant / Zigbee2MQTT if it triggers too early or too late on your mattress. The following values are available
low,middleandhigh. - Interval time (numeric): The sampling interval, which determines how often the sensor measures. You can configure this value continuously between 5 and 720 minutes.


Ingenious home assistant automations with the bed sensor
Now comes the fun part! What do we do with this new information in the smart home? Here are three highly useful automations including YAML code that you can copy and customize directly into your Home Assistant.
1. the smart, unobtrusive night light 💡
The goal: When you get up at night (between 23:00 and 06:00) to go to the bathroom, for example, an LED strip under the bed or a dim night light should come on at 10 % brightness. As soon as you get back into bed, it should go out again immediately.
alias: "Bedroom: Night light when getting up"
description: Switches the light on dimly when getting out of bed at night.
trigger:
  - platform: state
    entity_id: binary_sensor.bed_sensor_master_bedroom_presence
    from: "on"
    to: "off"
    id: "up"
  - platform: state
    entity_id: binary_sensor.bed_sensor_master_bedroom_presence
    from: "off"
    to: "on"
    id: "laid down"
condition:
  - condition: time
    after: "23:00:00"
    before: "06:00:00"
action:
  - choose:
      - conditions:
          - condition: trigger
            id: "got up"
        sequence:
          - service: light.turn_on
            target:
              entity_id: light.bedroom_nightlight
            data:
              brightness_pct: 10
              color_temp: 500
      - conditions:
          - condition: trigger
            id: "laid down"
        sequence:
          - service: light.turn_off
            target:
              entity_id: light.bedroom_nightlight
mode: single
2. the ultimate „good night“ routine 🌙
The goal: You are lying in bed and want to sleep. When the sensor detects that you are in bed and it is after 10 p.m., Home Assistant should automatically switch off all the lights in the house, lock the front door and lower the heating.
alias: "Bedroom: Good night routine"
description: Turns off the house as soon as you go to bed.
trigger:
  - platform: state
    entity_id: binary_sensor.bed_sensor_master_bedroom_presence
    to: "on"
    for:
      hours: 0
      minutes: 5
      seconds: 0
condition:
  - condition: time
    after: "22:00:00"
    before: "04:00:00"
action:
  - service: light.turn_off
    target:
      entity_id: all
  - service: lock.lock
    target:
      entity_id: lock.haustur
  - service: climate.set_temperature
    target:
      entity_id: climate.bedroom_heating
    data:
      temperature: 18
mode: single
Practical tip: Note the parameter for: minutes: 5. This prevents the house from being switched off immediately if you just sit on the bed for a moment to put on your socks.
3. preheat the coffee machine when you wake up ☕
The goal: When you finally get out of bed in the morning (e.g. between 06:00 and 08:00 on weekdays), the espresso machine's smart socket in the kitchen is activated. By the time you're ready in the bathroom, the coffee machine is ready for use!
Important tips for placement and troubleshooting
There are a few things to consider to ensure that the sensor works perfectly:
- The right mattress: With very thick, hard spring mattresses, the sensor sometimes needs a little more pressure. It usually works perfectly with foam or latex mattresses. Test the placement: if it is too insensitive, place it a little further towards the center of your body.
- Minimize latency: The sensor transmits via Zigbee. If the response is slow, check the signal strength (LQI) in Zigbee2MQTT. A Zigbee router (e.g. a smart socket) near the bed often helps to strengthen the mesh network.
- Two people in bed? If you have a double bed and want the house to be switched off only when both people are sleeping, you need a separate sensor on each side of the bed. In Home Assistant, simply group them together in a helper group („Bed occupied“).
YouTube video implementation
Conclusion
A resounding yes! A bed sensor like the Tuya TS0601 closes a crucial gap in the smart home. While normal motion detectors in the bedroom often cause frustration, a real presence sensor under the mattress provides exactly the context that Home Assistant needs to know: „The user is now asleep.“ Whether for unobtrusive night lights, controlling the heating or as a trigger for your perfect morning routine - for just a few euros, you can bring an upgrade into your home that you won't want to be without after the first night.
Take the test and let your smart home finally react intelligently to your sleep rhythm!
Useful links at a glance
- Official Zigbee2MQTT documentation for the Tuya TS0601
- Head office: Home Assistant Official Website
- Zigbee control: Zigbee2MQTT installation guide


0 Comments